Unity Plugin Getting Started
Wave Unity SDK provides the integrated plugins for Unity contents. The Unity contents can manipulate the poses of the head and controller by importing Wave Unity plugin’s scripts. And Wave Unity plugin’s render script can easily turn the main camera to a stereo view camera for VR.
We assume that you already have the essential experience to develop an Android app using Unity IDE and the knowledge of C# language.
Contents |
Set up your development environment
The target platform of VIVE Wave™ is Android. You’ll need to link the Android SDK to Unity IDE.
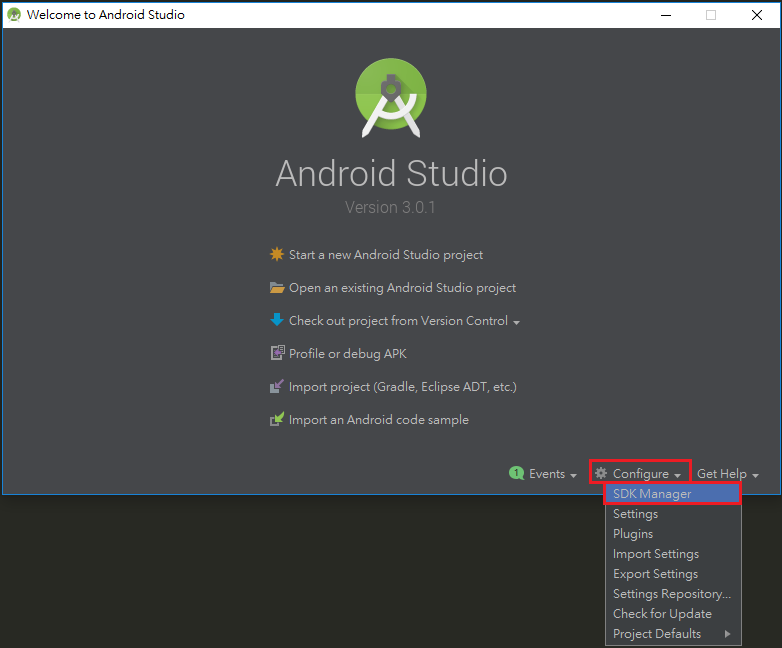
Install Android Studio.
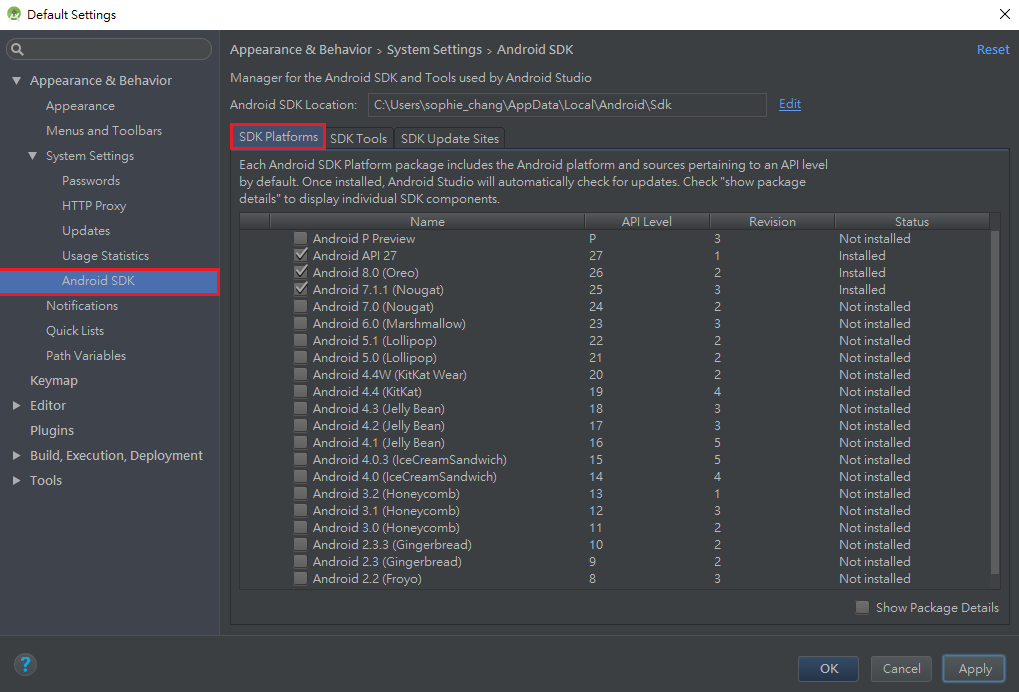
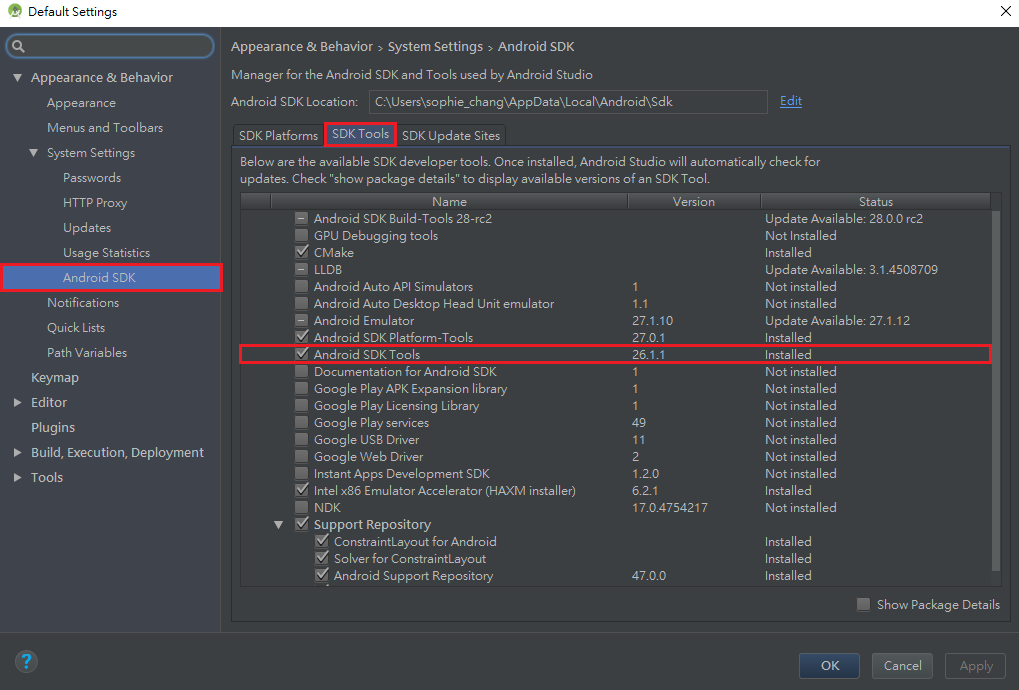
Check your Android SDK version and Android SDK Tools version in Configure > SDK Manager
- Android SDK 7.1.1 ‘Nougat’ (API level 25) or higher.
- Android SDK Tools version 25 or higher.
Install Unity.
Launch your Unity IDE.
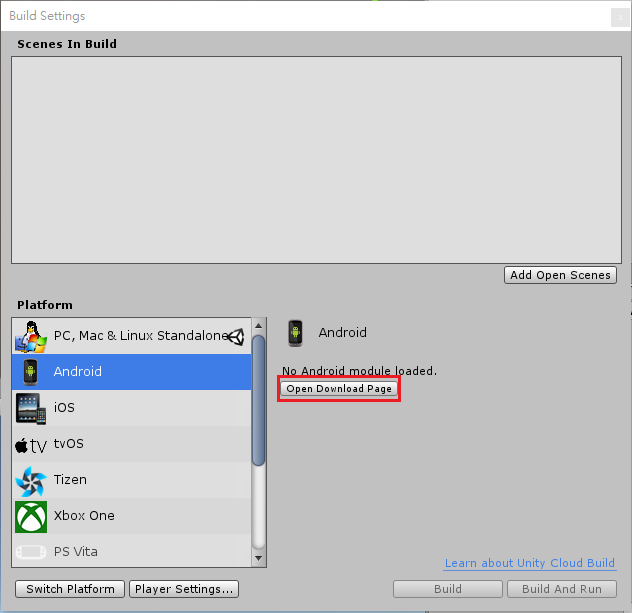
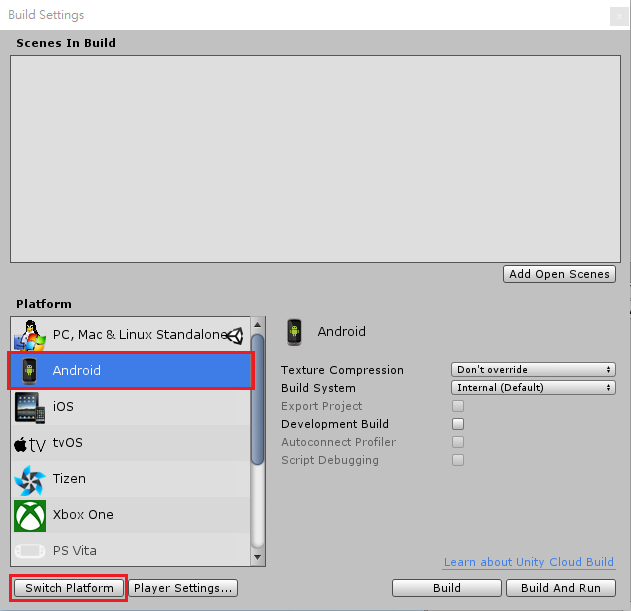
Switch platform to Android in File > Build Settings....
Download and install Android module.
Relaunch Unity.
Switch platform to Android
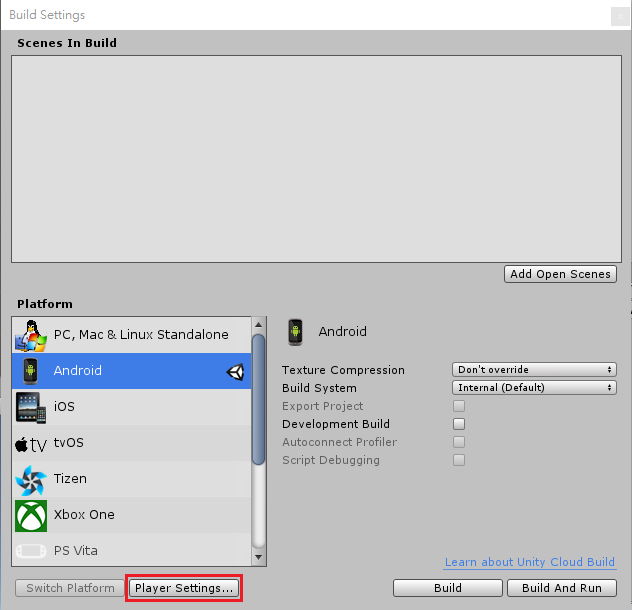
Open the configuration UI of Player Settings.
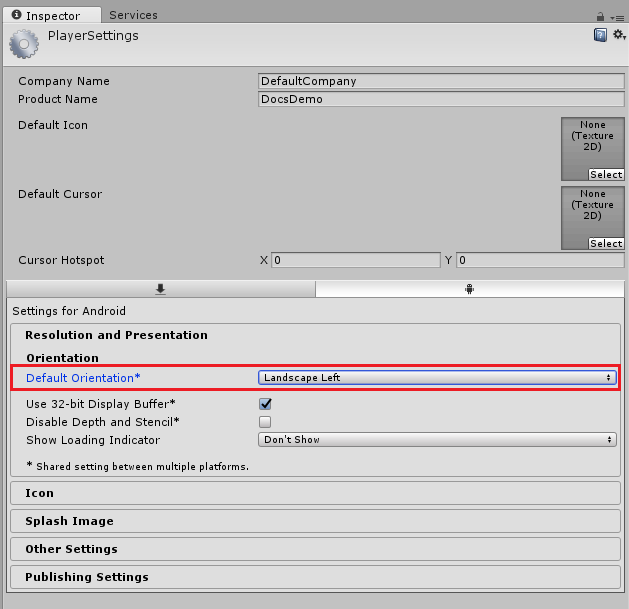
In Resolution and Presentation > Default Orientation, select Landscape Left.
Note
Default Orientation of WaveVR app MUST be Landscape Left. Otherwise, rendering result in your app may be wrong.
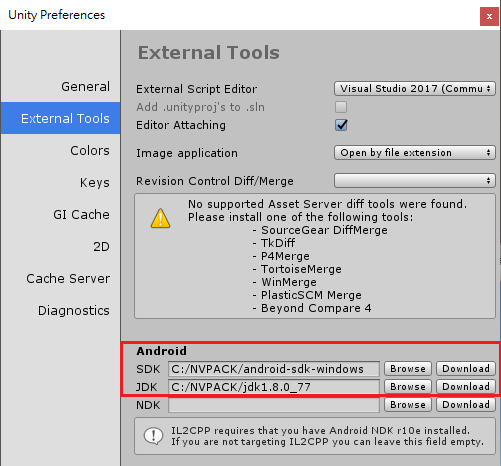
Set Android SDK and JDK paths in Edit > Preferences... > External Tools.
Import WaveVR plugin into Unity projects
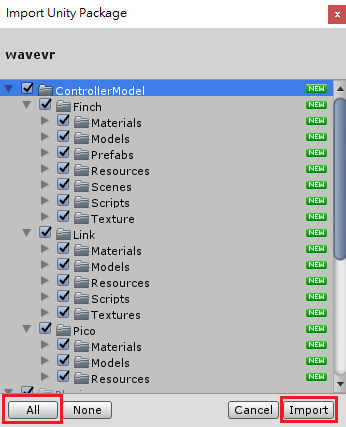
Import wavevr.unitypackage through Assets > Import Package > Custom Package....
Select All components, and click Import.
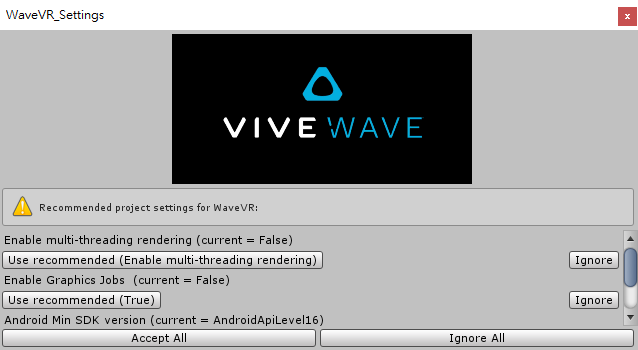
Note
Accepting all recommended project settings for WaveVR is recommended to beginners.
Using Prefab for Stereo View
Delete the auto-generated camera in your scene.
Drag and drop WaveVR prefab in Assets/WaveVR/Prefabs into your scene.
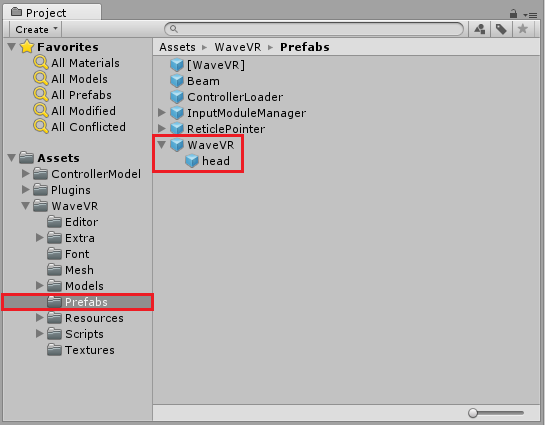
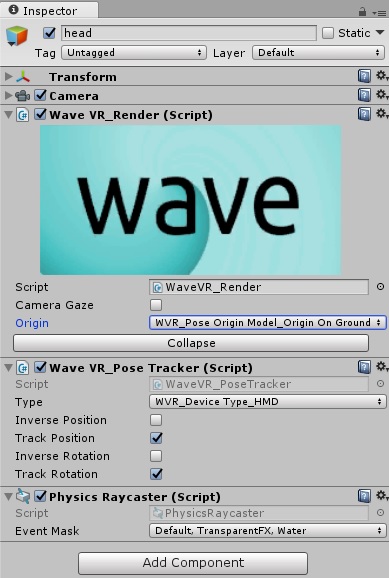
The prefab has a game object named head. It includes some components:
- Camera is the main camera. Its near/far value will affect both eyes’ near/far value. It is also used in Gaze Input to aim the target. It helps the game view to display a monocular vision from the head’s position. But in play mode, its Culling Mask is Nothing, which means nothing will show on the display through this camera.
- WaveVR_Render The main script for the render lifecycle. It will create both eyes and an ear. In play mode, it controls both eyes to render and display the binocular vision. The details will be provided later. All game objects of a scene should be ready before the controller is initializesd so set the render script execution order to -100(ms). You can set the Script Execution Order in Edit > Project Settings > Script Execution Order.

Binocular vision
- WaveVR_PoseTracker It will receive the pose event and change the game object’s transform according to the tracking device. You can choose an index to decide which device will be tracked.
Expand the Cameras
In play mode, the main camera will be expanded in the runtime. The following components and game objects are created and added to the head game object.
Expanded cameras
Inspector of expanded head
You can also expand the cameras by clicking the expand button. After expanding, the created game objects can be modified but do not change their hierarchy.

Expand Button
In the hierarchy, WaveVR game object take a position like a body or a playground origin. You can place your head in a scene by moving WaveVR. Do not change the transform of the head because it will be overwritten with the HMD pose.
This is the component added in the head after expanding.
- Physics_Raycaster (Unity original script)
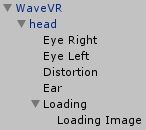
These are the game objects added as children of the head after expanding:
- Eye Right
- Eye Left
- Distortion
- Ear
- Loading
Both eyes will be based on the IPD to adjust their position to the left or right. Therefore, each eye will see from a different place.
Each eye has a camera. Its near and far clip planes’ values will be set according to the values of the main camera of head. And, its projection and field of view are controlled by a projection matrix that is taken from the SDK. The plug-in will set a target texture when rendering and the default viewport should be full texture. The other values you can set to the camera are: clear flag, background color, culling and culling mask. All the values will be set and copied from the main camera when expanded.
Distortion distorts both well-rendered eye textures and presents them to the display. This only works in the Unity Editor Play Mode for preview. It will be disabled when a project had been built as an app. The WaveVR compositor, which only works on target device, will be used instead.
Ear has a audio listener.
Loading is a mask for blocking other camera’s output on screen before WaveVR is initialized. Loading will be disabled as soon as the initialization is done.
Degree of Field
The VR device that can track a user’s rotation and position is a 6DoF device while a VR device that can only track a user’s rotation is a 3DoF device.
WaveVR supports both 3DoF and 6DoF. However, apps for 6DoF will not have the same design as apps for 3DoF. A dynamic switch may not be easy to do.
If a developer wants to only support 3DoF, there is an option in WaveVR_PoseTracker. Developer should uncheck all the track position in each WaveVR_PoseTracker component and choose Tracking Space as Tracking Universe Seated in WaveVR_Render. This makes sure that the head or controller position will be fixed to where you want it to be.
The PoseTracker
choose a tracking space
If a developer wants to support 6DoF, choose Model_Origin On Head or Model_Origin On Ground for your application.